เรามาสร้าง AI Detect อารมณ์ กันครับ
Detect อารมณ์ หรือที่เรียกว่า Emotion Detection ในภาษาอังกฤษ คือกระบวนการวิเคราะห์และระบุอารมณ์หรือความรู้สึกจากข้อมูลที่ได้รับ ซึ่งอาจเป็นข้อความ เสียง หรือภาพ โดยทั่วไปมักใช้เทคนิคการเรียนรู้ของเครื่อง (Machine Learning) หรือปัญญาประดิษฐ์ (AI) ในการทำงาน
มาเริ่มกันเลยครับ
- ให้เราเปิด Google Colab notebook ใหม่ หรือไปที่ https://colab.research.google.com/drive/1jD5XeoanbfK7AHmRHKplDnm9Mnb6p9-1?usp=sharing แล้วให้ทำการ Clone Github Library
!git clone https://github.com/misbah4064/emotion_recognition.git
%cd emotion_recognition
Code language: Python (python)
- ติดตั้ง Library ที่จำเป็น และ นำเข้า Library ที่ต้องใช้
import numpy as np
from google.colab.patches import cv2_imshow
import argparse
import matplotlib.pyplot as plt
import cv2
from tensorflow.keras.models import Sequential
from tensorflow.keras.layers import Dense, Dropout, Flatten
from tensorflow.keras.layers import Conv2D
from tensorflow.keras.optimizers import Adam
from tensorflow.keras.layers import MaxPooling2D
from tensorflow.keras.preprocessing.image import ImageDataGenerator
import os
Code language: Python (python)
- ทำการโหลดโมเดล
os.environ['TF_CPP_MIN_LOG_LEVEL'] = '2'

mode = "display"

# Create the model
model = Sequential()

model.add(Conv2D(32, kernel_size=(3, 3), activation='relu', input_shape=(48,48,1)))
model.add(Conv2D(64, kernel_size=(3, 3), activation='relu'))
model.add(MaxPooling2D(pool_size=(2, 2)))
model.add(Dropout(0.25))

model.add(Conv2D(128, kernel_size=(3, 3), activation='relu'))
model.add(MaxPooling2D(pool_size=(2, 2)))
model.add(Conv2D(128, kernel_size=(3, 3), activation='relu'))
model.add(MaxPooling2D(pool_size=(2, 2)))
model.add(Dropout(0.25))

model.add(Flatten())
model.add(Dense(1024, activation='relu'))
model.add(Dropout(0.5))
model.add(Dense(7, activation='softmax'))


def emotion_recog(frame):
    model.load_weights('model.h5')

    # prevents openCL usage and unnecessary logging messages
    cv2.ocl.setUseOpenCL(False)

    # dictionary which assigns each label an emotion (alphabetical order)
    emotion_dict = {0: "Angry", 1: "Disgusted", 2: "Fearful", 3: "Happy", 4: "Neutral", 5: "Sad", 6: "Surprised"}

    # frame = cv2.imread("image1.jpg")
    facecasc = cv2.CascadeClassifier('haarcascade_frontalface_default.xml')
    gray = cv2.cvtColor(frame, cv2.COLOR_BGR2GRAY)
    faces = facecasc.detectMultiScale(gray,scaleFactor=1.3, minNeighbors=5)

    for (x, y, w, h) in faces:
        cv2.rectangle(frame, (x, y-50), (x+w, y+h+10), (255, 0, 255), 3)
        roi_gray = gray[y:y + h, x:x + w]
        cropped_img = np.expand_dims(np.expand_dims(cv2.resize(roi_gray, (48, 48)), -1), 0)
        prediction = model.predict(cropped_img)
        maxindex = int(np.argmax(prediction))
        cv2.putText(frame, emotion_dict[maxindex], (x+20, y-60), cv2.FONT_HERSHEY_SIMPLEX, 1, (255, 255, 255), 2, cv2.LINE_AA)

    # cv2_imshow(frame)
    return frame
Code language: Python (python)
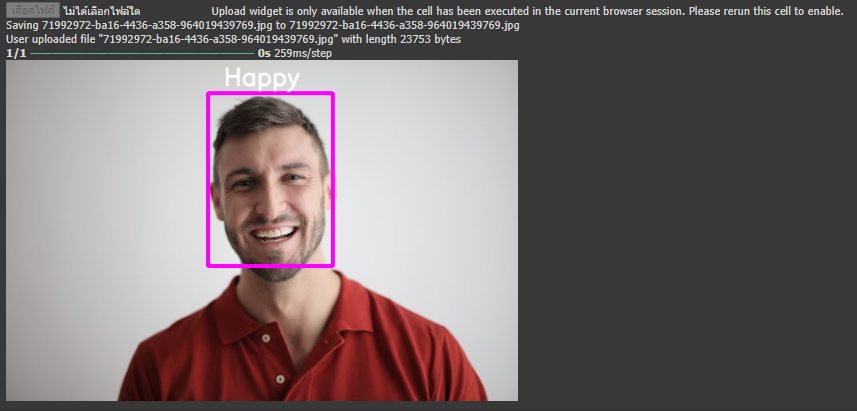
- เลือกรูปภาพเพื่อทดสอบ Detect อารมณ์
from google.colab import files

uploaded = files.upload()

for fn in uploaded.keys():
  print('User uploaded file "{name}" with length {length} bytes'.format(
      name=fn, length=len(uploaded[fn])))


  path="/content/emotion_recognition/"
  input = ('{name}').format(name=fn, length=len(uploaded[fn]))
  output = path+input
  # ทดสอบ print path file
  # print(output)
  input_img = cv2.imread(output)
  # ทดสอบรัน รูปภาพ
  # cv2_imshow(  input_img  )
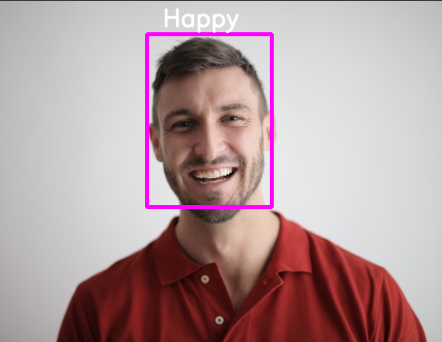
  output_img = emotion_recog(input_img)
  cv2_imshow(output_img)
Code language: Python (python)

- เลือก Video เพื่อทดสอบ Detect อารมณ์
** ไฟล์ output จะชื่อ output.avi **
import cv2
from google.colab import files

uploaded = files.upload()

for fn in uploaded.keys():
  print('User uploaded file "{name}" with length {length} bytes'.format(
      name=fn, length=len(uploaded[fn])))


  path="/content/emotion_recognition/"
  input = ('{name}').format(name=fn, length=len(uploaded[fn]))
  output = path+input

cap = cv2.VideoCapture(output)
ret, frame = cap.read()
frame_height, frame_width, _ = frame.shape
#ทำการเปลี่ยนชื่อไฟล์ output 'output.avi'
out = cv2.VideoWriter('output.avi',cv2.VideoWriter_fourcc('M','J','P','G'), 10, (frame_width,frame_height))
print("กำลังประมวลผลวีดีโอ...")
while cap.isOpened():
  ret, frame = cap.read()
  if not ret:
    out.release()
    break
  output = emotion_recog(frame)
  out.write(output)
out.release()
print("เสร็จสิ้นการประมวลผลวิดีโอ")
Code language: Python (python)
เป็นอันเสร็จเรียบร้อยครับ ต่อไปก็สามารถนำไปพัฒนาเขียนโปรแกรมสั่งงานต่างๆด้วย AI Detect อารมณ์ ใบหน้า ได้ครับ


